Project Overview – Block Paved Driveway in Burnley
This driveway in Burnley had seen better days, with tired old concrete slabs and poor drainage letting the property down. Our team was brought in to completely refresh the space with smart new block paved finish.
Before and After Comparison
Before:
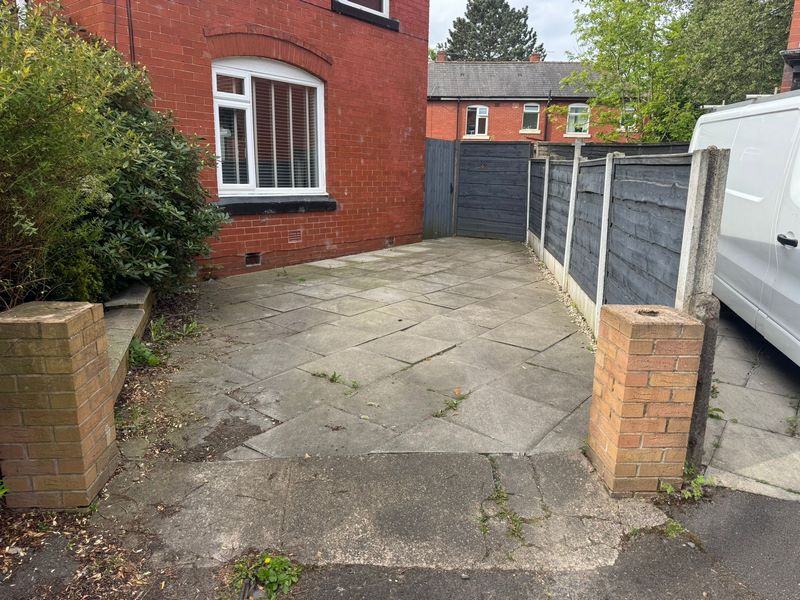
- The original driveway consisted of aged, uneven concrete paving slabs that had shifted over time and were covered in weeds. The existing space was visually unappealing and lacked both durability and proper kerb appeal.
After:
- The new driveway is now smooth, durable, and visually striking. It not only provides better functionality for off-road parking but also enhances the overall appearance of the front of the property. The customer was thrilled with the transformation.


Materials Used
- Block Paving
- MOT Type 1 Crushed Stone
Construction Stages
- Site Clearance & Excavation:
- We began by lifting and removing the old concrete paving slabs, which had become cracked and sunken over time. All debris was disposed of responsibly. Using a compact excavator, we then excavated the area to the appropriate depth to allow for a full sub-base build-up.
- Sub-Base Preparation:
- With the area fully excavated, we installed a geotextile membrane to help suppress weed growth and maintain separation between the sub-grade and the base materials. A generous layer of MOT Type 1 crushed stone was spread across the area and compacted. This formed the structural foundation of the new driveway and ensures strength and stability for years to come.
- Sand Screeding & Edging:
- We then applied a sharp sand screed bed over the compacted sub-base. The sand was levelled with screed bars to ensure a smooth and even surface for the blocks to be laid. Block paving edge restraints were installed and bedded into concrete around the perimeter to secure the borders and prevent any lateral movement of the blocks once in use.
- Block Paving Installation:
- We laid the blocks in a traditional herringbone pattern for maximum strength and visual appeal. Charcoal and red blocks were used, with a striking double border detail to define the area. A diamond pattern feature was included at the centre to give the driveway a unique character.
- Finishing Touches:
- Once the blocks were laid, kiln-dried sand was brushed into the joints and the entire area was compacted again to lock the blocks firmly in place.
Conclusion
The new block paved driveway completely transformed the front of the property. It offers a clean, stylish, and low maintenance finish while also providing much needed durability and off-road parking space. The added border and central pattern give the driveway an elegant, bespoke appearance. The customer was delighted with the end result and the care taken throughout the installation.

